
Ah, Valentine's Day. Pinks, reds, purples, cupids, hearts, chocolates, and flowers adorn storefronts across the world. It's easy to feel the pull of seasonal decor. For me, it's the Target seasonal selection in the back of the store that sucks me into its orbit.
This year, as I try to be more intentional about my spending, I decided to use the stacks of craft supplies I've accumulated over the years to make my own heart garland to jazz up our recently renovated fireplace.

Without certainty, I'd say this entire project cost about $6 give or take a few dollars.
The fun in this project is you can let your creativity shine! I have included templates for the hearts I created, but use those as a guide and really make them your own. Don't like the embroidery I created? Just do whatever feels right to you. Want to switch up the colors and make it a goth-heart garland (excuse me while I immediately see if I have supplies to do this, myself)? Go for it! Make this project yours, and please be sure to share your work with me by tagging me on Instagram or TikTok (@the_morningcrafter).
With that, let's get to it!
Supplies:
- 8.5"x11" felt sheets in 3 colors- 2 sheets per color
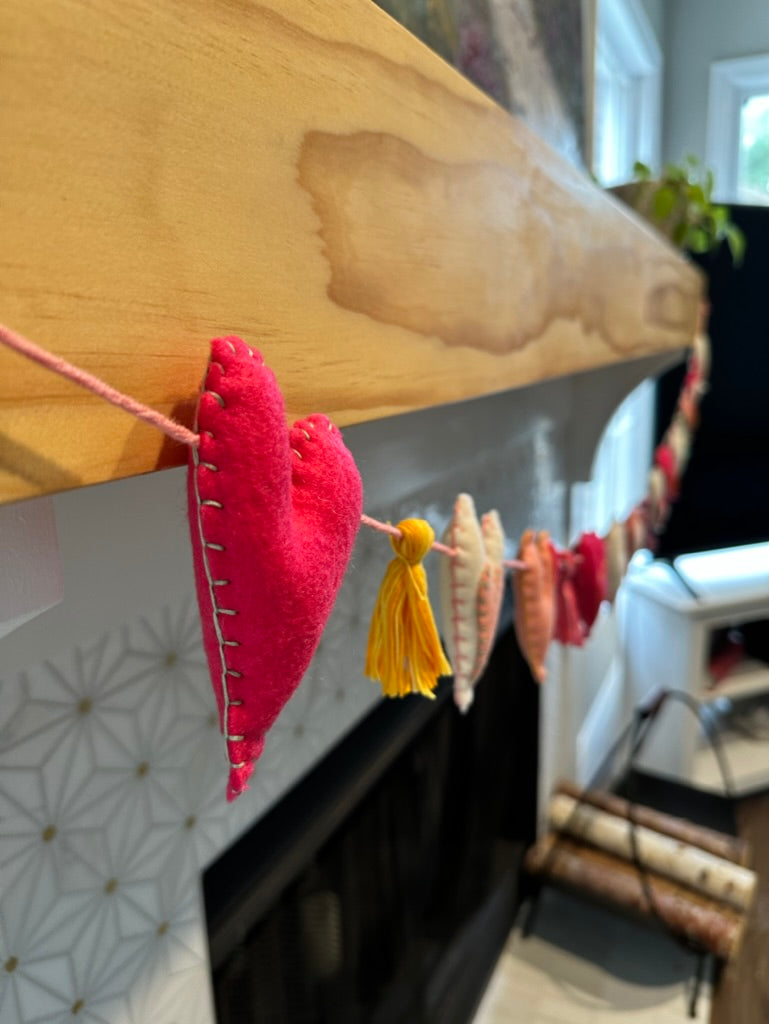
- For my garland, I used a dark pink, a medium pinky mauve, and a light pink
- Embroidery floss
- You'll want 5 skeins to make tassels out of, and 4 skeins in complementing colors to your felt sheets for your embroidery work
- 6 feet (2 yards) of yarn
- 1 small bag of Poly-Fil (alternatively, you could stuff these with scrap fabric, scrap felt, yarn bits, etc.
- Scissors
Heart instructions:
- Please download and print this free document for all of the heart templates you will need to create this garland.
- Using the above templates, cut the specified amount of hearts in the appropriate colors.

- Affix the applique hearts and embroidery detail to each front facing heart as shown in the templates. Feel free to get weird with it and add or omit any detail you'd like.
- Once each of your front sides of your hearts look the way you'd like, line up the matching backside of the heart to the front side.
- Starting at the mid-point between the right hump and the bottom, start a blanket stitch and work it all the way around the heart until you have an opening of about 3 inches- enough space to add your Poly-Fil stuffing.
- After you stuff your heart to your preference, continue to work the blanket stitch all the way to your starting stitch, and tie off.
- Insert your needle into the space between the two felts and pull it out the other side, snipping the remainder of your thread so it is hidden inside the heart.
- Do this for all of your hearts.

Tassel instructions:
- Using an unused embroidery floss skein with the paper still on, fold your embroidery floss in half.
- Tie another piece of thread around the top creating a loop out of the mid-point of your skein. Make sure to tie this very tight.
- Remove the two papers from the skein.
- Take your scissors and cut about 1/4 inch up from the bottom, eliminating all of the loops from the bottom of your tassel.
- Smooth out your threads and voila! A tassel!
- Make 5 of these in the colors you used for your embroidery on your hearts.

Assembly instructions:
- On a clean, large surface, lay out your hearts and tassels how you would like them to look once strung.
- Using a darning or yarn needle, thread your yarn piece.
- Starting at the last heart (the heart farthest to the right of your garland), thread your needle and yarn through the right side, all the way out the left side of the heart mid-way down the humps. This lines up right about where the dip between the humps is.
- Continue stringing your hearts and tassels as you'd like for them to show up on your garland from right to left.
- Once all of your hearts and tassels are strung, tie a loop on each side of your yarn.
- Hang your garland and snap a photo. YOU DID IT!
I'd love to see your finished garlands! Tag me on Instagram or TikTok @the_morningcrafter.

Happy making!