
Back in the fall, I received some gorgeous yarn from Lion Brand. It was their Re-Spun product line - a recycled polyester blend as part of their sustainable stitch series.
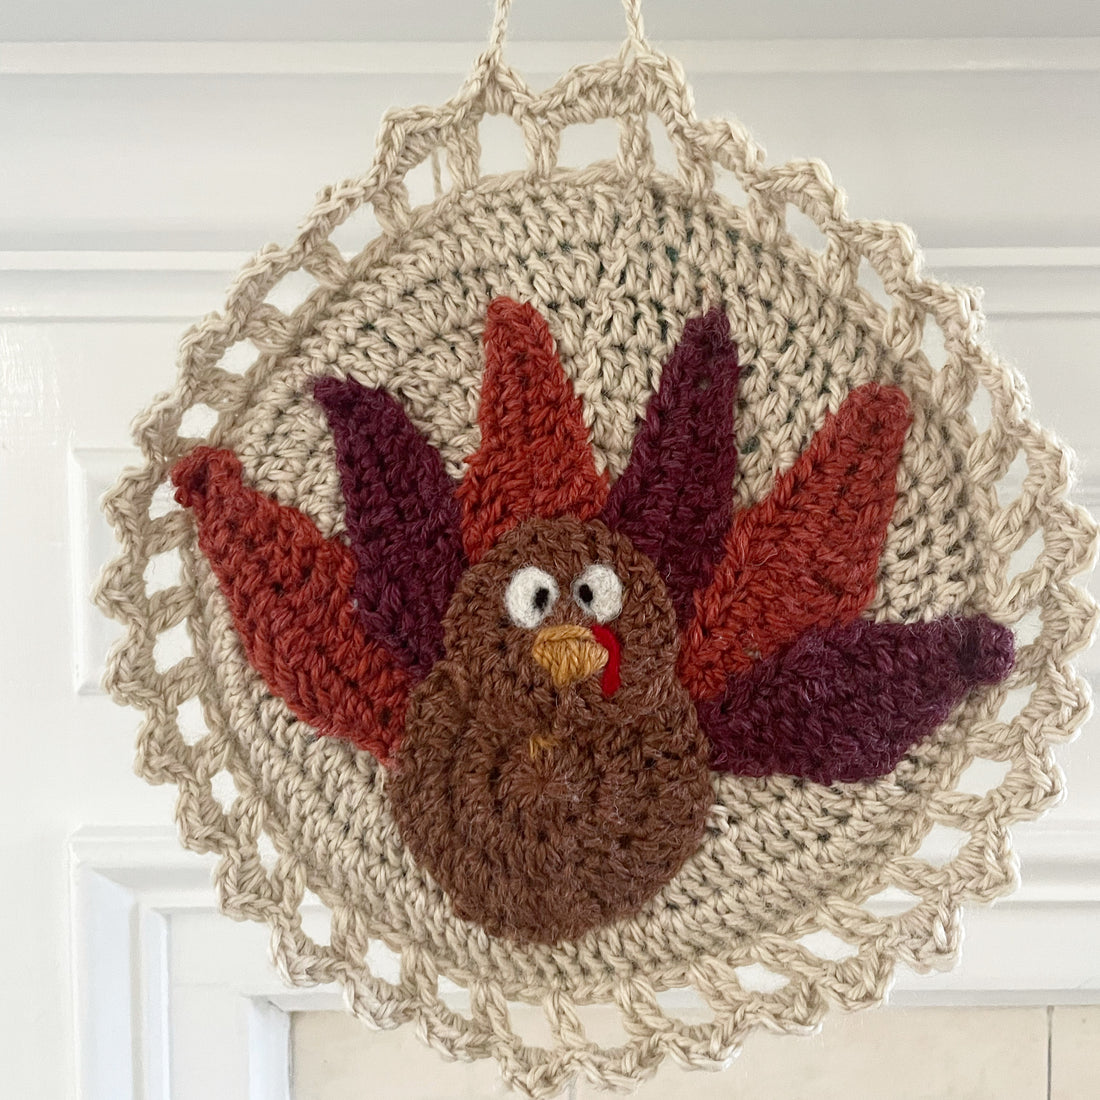
I wanted to make something fun to hang in our house for the Thanksgiving holiday, and these colors screamed "TURKEY" to me. So, I started stitching. I wasn't too sure how I wanted to construct this little turkey, but after playing around with a few stitches and shapes, he came together really quickly.
Supplies
- 5mm crochet hook
- Yarn needle
- Felt (optional)
- Re-Spun yarn from Lion Brand in Parchment, Cornsilk, Amber, Wine, & Cider
- Cardboard piece cut to size
Pattern notes
Pattern written in US crochet terms.
- Ch= chain
- St= stitch
- Sl st= slip stitch
- Sc= single crochet
- Hdc= half double crochet
- Dc= double crochet
- Tc= treble crochet
Instructions
BACKGROUND: Make 2
- In Parchment, make a magic circle, ch 3. 12 dc in magic circle, pull tight, sl st into ch 3.
- Ch 3 (this will count as your first dc). Dc into same st. 2 dc in every stitch around the circle. Sl st into ch 3.
- Ch 3. Dc into same st. 1 dc in next st. 2 dc in next st. alternate all the way around. Sl st into ch 3.
- Ch 3. Dc into same st. 1 dc into next 2 st. 2 dc in next st. continue around. Sl st into ch 3.
- Ch 3. Dc into same st. 1 dc into next 3 st. 2 dc in next st. continue around. Sl st into ch 3.
- Ch 3. Dc into same st. 1 dc into next 4 st. 2 dc in next st. continue around. Sl st into ch 3.
- Ch 3. Dc into same st. 1 dc into next 5 st. 2 dc in next st. continue around. Sl st into ch 3.
- Ch 3. Dc into same st. 1 dc into next 6 st. 2 dc in next st. continue around. Sl st into ch 3. Tie off
Cut a circle out of cardboard to fit inside of these 2 circles. Stitch them closed around the cardboard with a sc in each stitch around.
TAIL FEATHERS: MAKE 6 (3 in Wine, 3 in Amber)
- Ch 16. In 2nd ch from hook, sc. sc in next stitch. 2 hdc. 2 dc. 2 tc. 2 dc. 2 hdc. 3 sc. Sc again in last stitch, turning your work to continue up the next side. Sc again in same stitch, this time on other side. Sc in next stitch. Sc in next stitch. 2 hdc. 2 dc. 2 tc. 2 dc. 2 hdc. 2 sc. Tie off, leaving a long tail to use when stitching.
- Stitch each of these in an overlapping pattern onto the front side of your circle background.
TURKEY HEAD
- In Cider, make a magic circle, ch 3. 12 dc in magic circle, pull tight, sl st into ch 3.
- Ch 3 (this will count as your first dc). Dc into same st. 2 dc in every stitch around the circle. Sl st into ch 3. Tie off, leaving a long tail to stitch later.
- Using Cornsilk, embroider a beak in the center of the circle.
- OPTION to felt now or embroider eyes onto the head. (This can also be done later)
TURKEY BODY
- In Cider, make a magic circle, ch 3. 12 dc in magic circle, pull tight, sl st into ch 3.
- Ch 3 (this will count as your first dc). Dc into same st. 2 dc in every stitch around the circle. Sl st into ch 3.
- Ch 3. Dc into same st. 1 dc in next st. 2 dc in next st. alternate all the way around. Sl st into ch 3. Tie off, leaving a long tail to stitch later.
- Stitch the body first to cover the bottom of all 6 feathers. Then stitch head overlapping the body.
FINISHING
- Now that your turkey is all set, in Parchment, add the trim and hanger to your circle. I did Ch 3, then 2 dc in first st, ch 2, skip 2 sc, 2 dc in next st. Continue all the way around. Sl st into ch 3.
- Ch 1. Sc, hdc, dc, hdc, sc in the ch 2 space. Sl st into second dc st. Continue around.
- When you get back to the beginning, sl st to close that round, and chain 20 (more if you want your hanger longer). Sl st to attach 2 bumps over. Tie off.
